Torch Down Rolled Roofing Installation

Torch Down Roofing Installation Gaf Cool Roof System Youtube
The Benefits Of Torch On Roofing Installation
Brick Slips Installation Torch Down Felt

Torch Down Roofing My Way Youtube

Guide To Torch Down Roofing Materials Components Pros Cons Iko

Good Roofing Guide How To Guides How To Buy And Use A Gas Torch For Roofing How To Buy And Use A Gas Torch For Roofing Jj Roofing Supplies
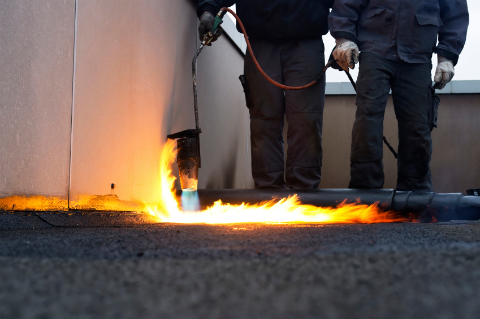
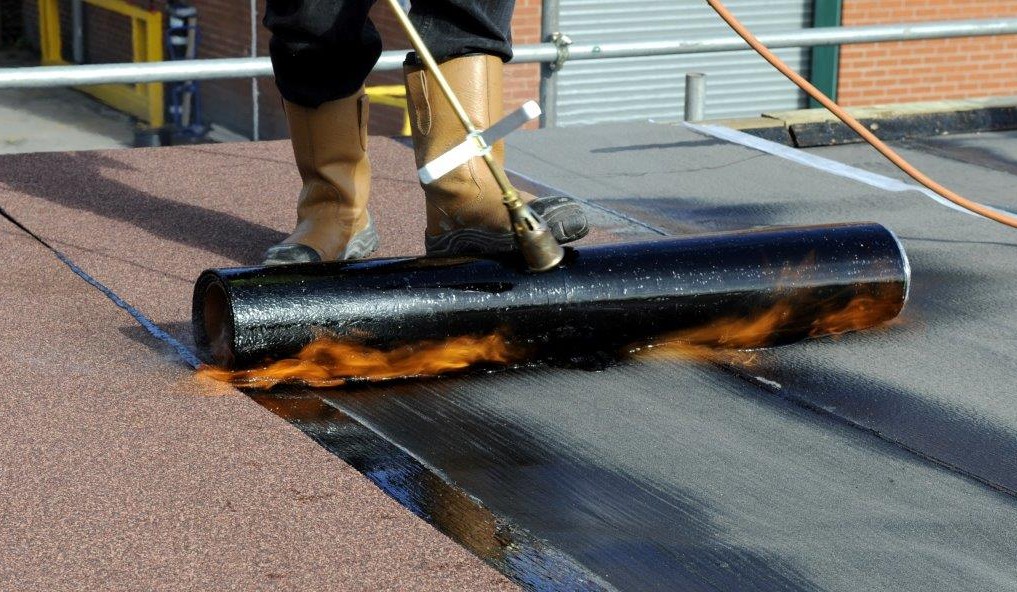
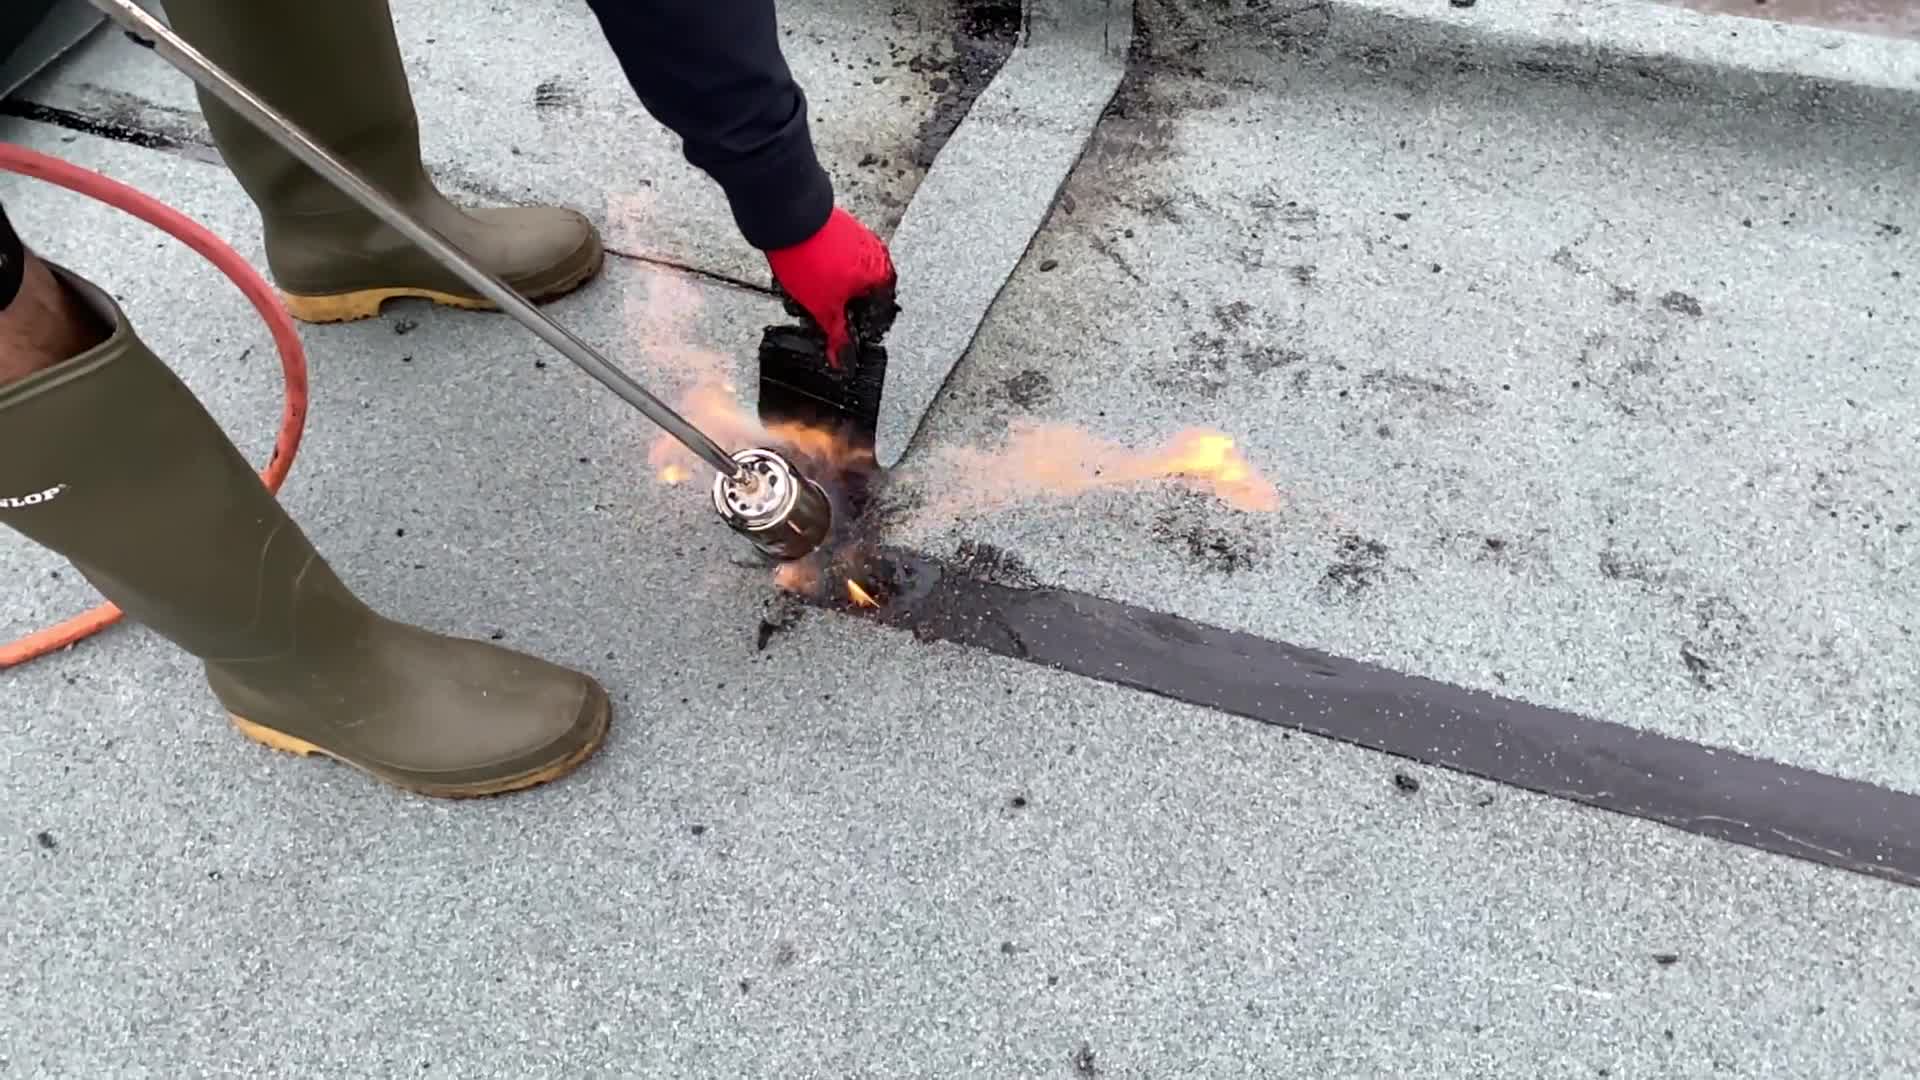
Installation of a three layer torch down roofing system requires knowledge and experience with using a blowtorch.
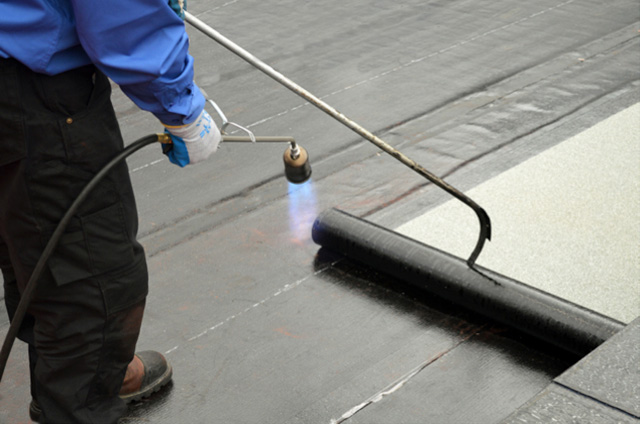
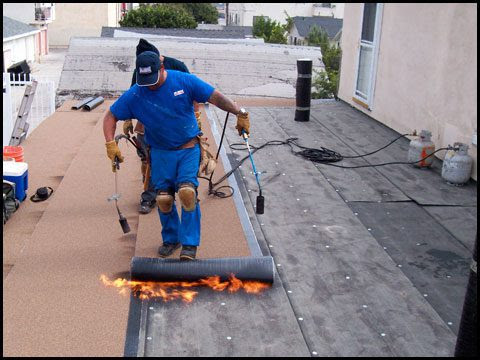
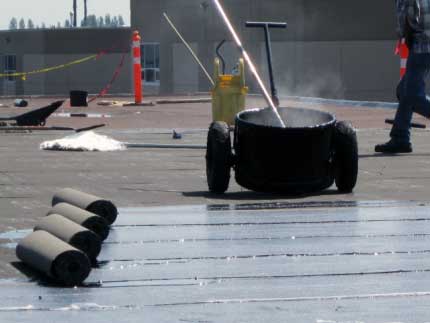
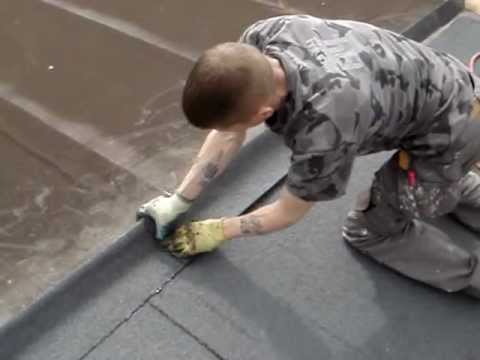
Torch down rolled roofing installation. Torch down step by step some trick and tips on how to lay down a torch down roofing. Wear heavy duty gloves and work boots. Install the overlay. Run the tip of the flame along the crease between the roofing felt and the roofing roll.
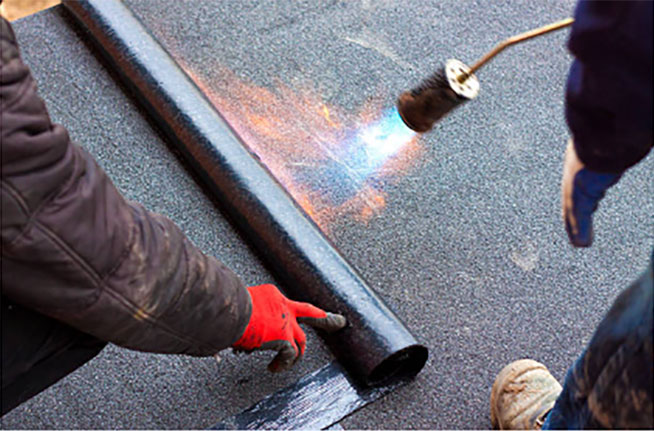
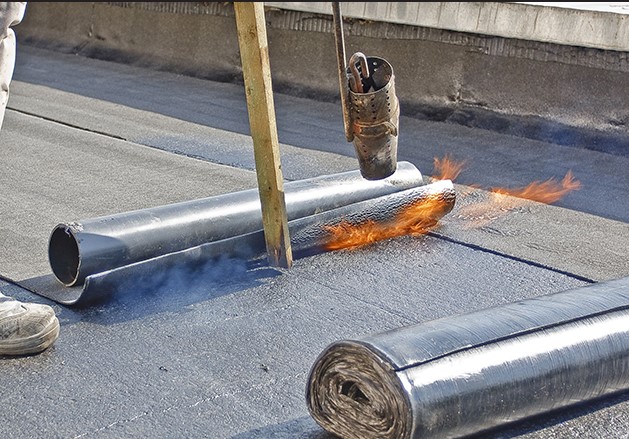
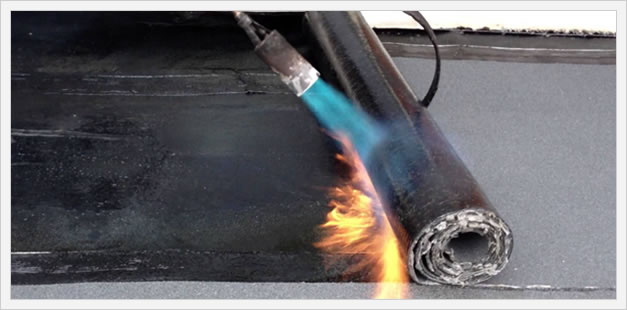
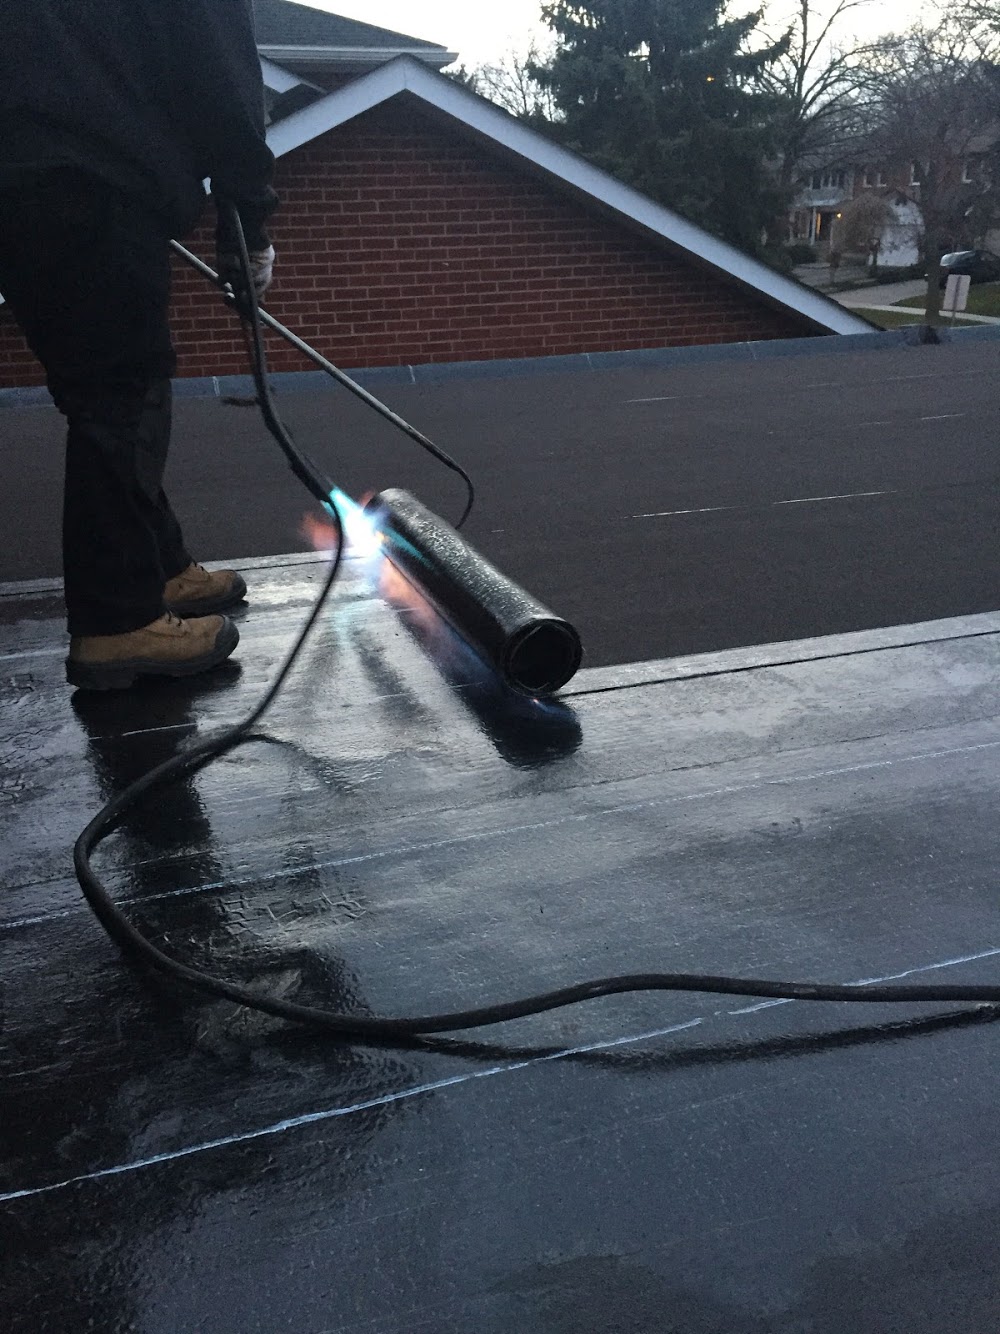
Cut the bitumen sheets to length with a. Insulation is especially important in colder climates but it s an essential part of any. In this installation method sheets of modified bitumen are rolled out onto the roof and a roofing professional uses a hand held propane torch to heat the material and adhere it to the surface. Torch down roof application step 1.
Roll modified bitumen roofing sheets over the entire roof. Torch down roofing sometimes referred to as torch on roofing is so named because it requires an open flame propane torch. On top of the insulation your roofing contractor will lay down a vapor barrier. Installing the torch down roofing involves flames and melted asphalt.
Once you see bubbles forming gently roll the roofing forward with your foot to install. Using this type of tool to install a torch down system calls for the right type of materials and insulation to ensure that the torch does not damage the overall structure. Bitumen roofing rolls can be large and heavy so get help. Melting bitumen rolls 1.
Align the next sheet of modified bitumen roofing so it covers the edge of the first sheet by a few inches and repeat the process.

Torch Down Techniques And Details Application Video Youtube
Modified Bitumen Roofing Installation Basics

How To Install Torch Down Roofing Alicedecordesign Co

Torch Down Roofing Step By Step Instructional Video Check This Out Youtube
Torch Down Flat Roofing Services Miller S Home Improvement
Signature Torch On System Range Sig Roofing

Roll Roofing Installation Flat Roof Installation Step By Step Must Watch Youtube
A Guide To Flat Roof Options Construction And Materials Burton Roofing

Self Adhesive Vs Torch Down Modified Bitumen In Corpus Christi Tx

Torch Applied Modified Bitumen Overview Application Excellence Youtube
Torch Down Roof Roofing Cost Calculator

Torch On Felt Is Now The Most Popular Method In Use Today Flat Roof Installation Flat Roof Repair Roofing

Learning How To Use A Torch For The First Time Modified Bitumen Torch Down Rubber Youtube
Roofers Like Torch Down Roofing It Is Also Dangerous Luso Roofing

Roll Roofing Installation With Propane Stock Footage Video 100 Royalty Free 20582584 Shutterstock

Torch On Felt Surrey Information Dle Roofing Surrey
Modified Bitumen Roofing Tips Cambie Roofing Drainage

How To Install Rolled Roofing On My Garden Shed Build Youtube
1
What Is Torch On Roofing Pro Torch Roofing

Image Result For Box Gutter Drain Flat Roof Leaking Flat Roof Roof Drain

Flat Roof Repair How To Make A Repair On A Torch Down Rubber Roof Youtube

What Is Torch On Roofing And Why Use It Whonnock Roofing
Torch On Felt Roofing Youtube

7 Steps Of Torch Down Roofing You Can Do By Yourself

Flat Roof Repair Guide Easy For Diy Or Trade

How To Install A Classicbond Epdm Flat Roof Youtube

Gaf Tri Ply App Smooth Modified Bitumen 3 Ft X 33 Ft 100 Sq Ft Net Membrane Roll For Low Slope Roofs 3687000 The Home Depot Roll Roofing Roofing Roofing Systems

Demonstration Of Epdm And Torch Down Why One Is Better Than The Other Youtube

Torch Down Roofing Installation Anderson Roof Issaquah

Roofing Options Pros Cons Jobe Roofing
Armatool Roofing Gas Torch 600mm Wickes Co Uk

Base Flashing A Low Slope Roof Protradecraft

General Roofing Grs On Twitter Roof Maintenance Roofing Maintenance Checklist

Save Big On This Christmas Self Adhesive Roofing Roll For Low Pitch Roofs At Just 58 Roll Leatherback Roofing Membr Roofing Materials Roofing Roll Roofing

How Do I Stop Moss Growing On Roof Shingles And Tiles Roofing Superstore Blog

Installing Roofing Felt In Six Easy Steps Jj Roofing Supplies

Technatorch Sbs Torch On Mineral Felt Sbs Torch On Felt Tecnatorch Jj Roofing Supplies
Fixing Felt Roof Shingles Burton Roofing

Iko App Torch On Cap Sheet Iko Group Plc
Https Www Ikogroup Co Uk Wp Content Uploads 2017 07 Iko Flat And Pitched Roofing Design Guide A5 32pg July17 Electronic Intrim Pdf

Grp Or Epdm Which Flat Roofing Material Is Best Roofing Superstore Blog

