Tighten Roof Pivot Bolts

Remove The Pivot Holding Bolt 13mm Hex Loose The Rear Seat Belt Screw Notice Remember To Tighten This Screw After Assemb Suzuki Jimny Rear Speakers Suzuki
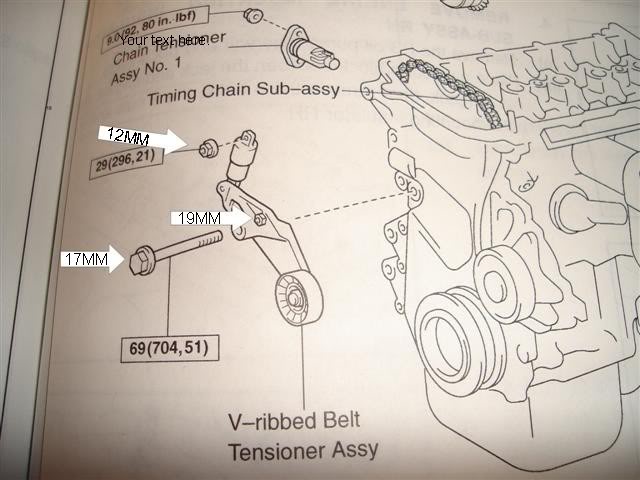
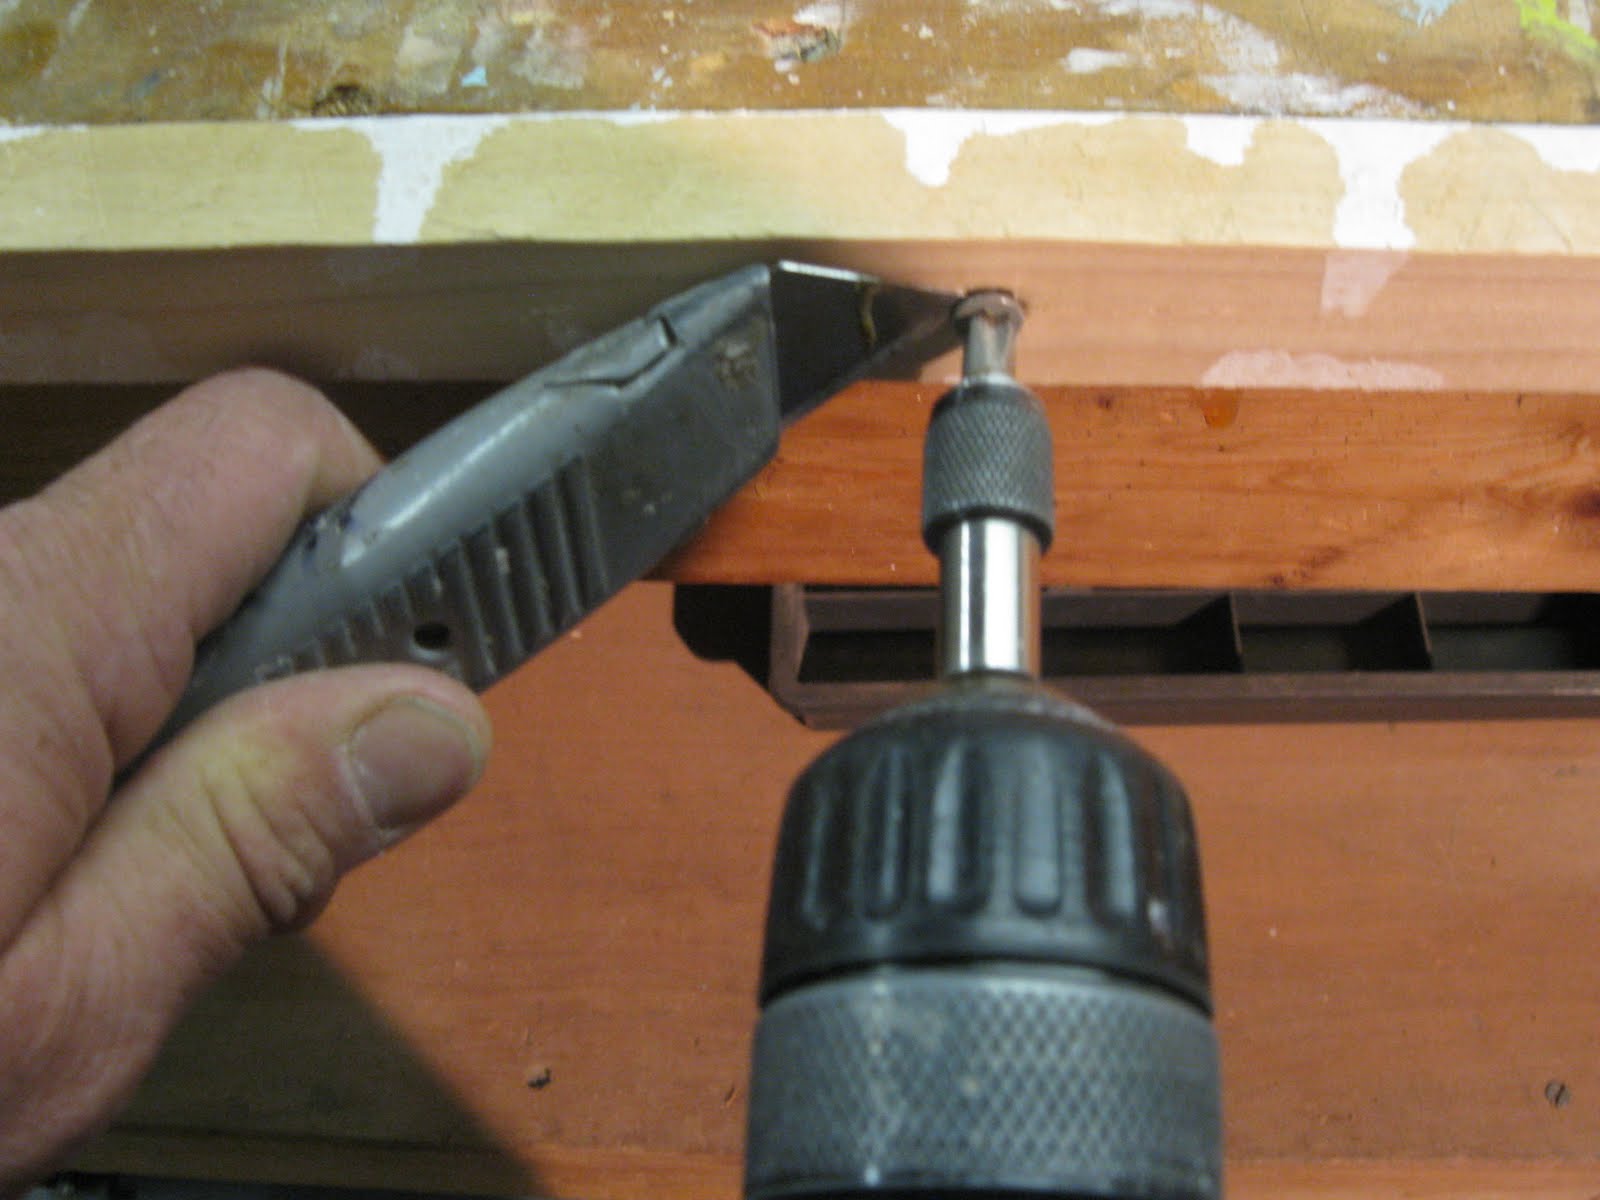
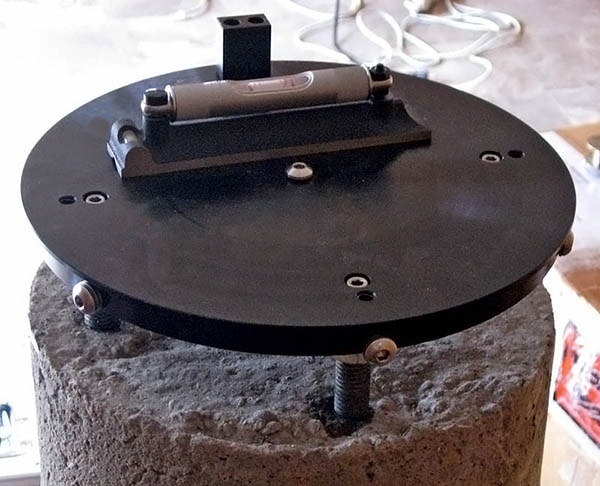
Fixing A Broken Bolt Of The Serpentine Belt Tensioner Toyota Corolla

Sx Page 1 Of 19

How To Adjust A Door That Rubs Doesn T Shut Or Is Sagging

Mr2 Owners Club How To Tighten Up The Alternator Belt

Adjusting The Jacques Board Shear The Guild Of Book Workers Bookbinding Tools Bookbinding Tutorial Binding Supplies
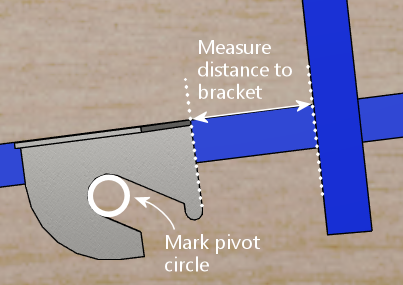
Assemble the bush and spindle onto the bracket fit the flat washer and screw on the nyloc nut and tighten.
Tighten roof pivot bolts. 2 install the second wafer head screw and tighten it. Assemble the m10 x 20mm bolts shake proof washer and channel nut as per the diagram and ensure that the channel nuts are loose. Be sure to use a torque wrench and tighten to the manufacturer s specification see illustration. Fitting the pivot roller to the longitudinal bars.
Go back and tighten the bolts in steps 7 8 to 30 foot pounds. National hardware 3 8 in x 6 in zinc plated steel plain eye bolt. Overtightening can cause damage to the pivots. Loosen the screws which retain the main pivot bracket to its support.
If in doubt consult the manufacturer s information. Never blast pivots with a hose when cleaning. Insert provided barrel nuts into the holes of the roof rack clamp and position roof rack clamps underneath crossbars. Shift the main pivot bracket toward either side as necessary to obtain the proper clearance 0 38 inch between the rear side rail and the quarter outside rear side belt mouldings and tighten the retaining screws.
Fit the roof rack with the top sections of the rotating mounts attached to it to the bottom sections of the rotating mounts and reinstall the two bolts to hold the two sections together. Blue thread lock is needed to ensure the pivot bolts don t loosen over time and you will need a torque wrench to tighten all bolts axles to the correct specification. Slide all four carriage bolts into bottom slot of roof tray. 1 install the first m6 x 15 7 mm wafer head screw with the blue thread lock and tighten it to ensure that the part does not move when the awl is removed.
Item 64230 model n221 499. G use an awl to center the bracket hole below the access hole in the roof rail.
Rtu2000 00 Cpe Roof Unit Transceiver 100 Milliwatt Output Po Parts List Tune Up Info Exhibit 10 Partslist Tuneup Pdf Spectrapoint Wireless

Fords Unlimited Car Club Tech Info Convertible Top Repair Adjustment Manual
Sunroof Howto Wanted Bmw E9 Coupe Discussion Forum

Rockymounts Euro Pitchfork Roof Bike Rack Installation Instructions Manualzz
Pinscape Controller Build Guide
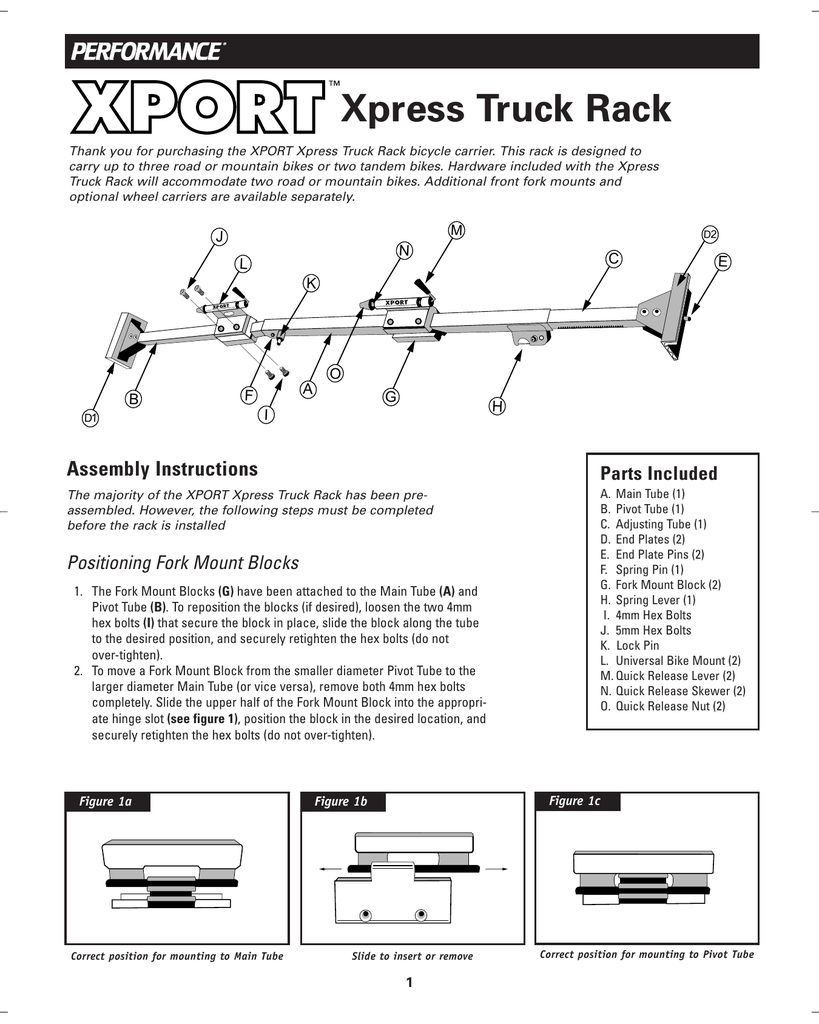
Xport Xpress Truck Rack Manualzz

How To Adjust Rear Gears

Jeep Cherokee Xj Transfer Case Linkage Kit Azzy S Design Works Transfer Case Wrangler Accessories Jeep Cherokee
Https Www Carid Com Images Rola Pdf 59731 Installation Instructions Pdf
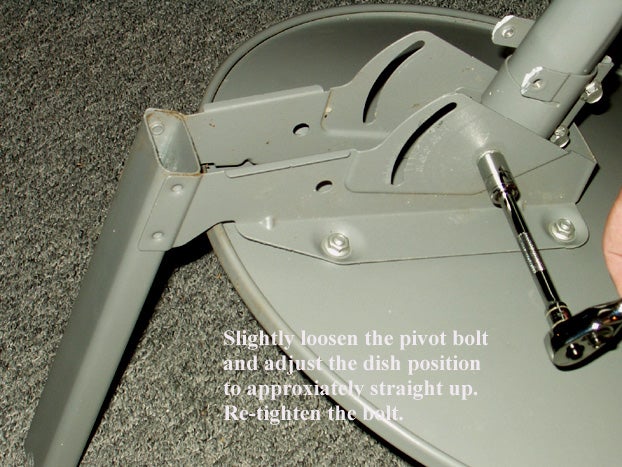
This Satellite Dish Is For The Birds 16 Steps With Pictures Instructables
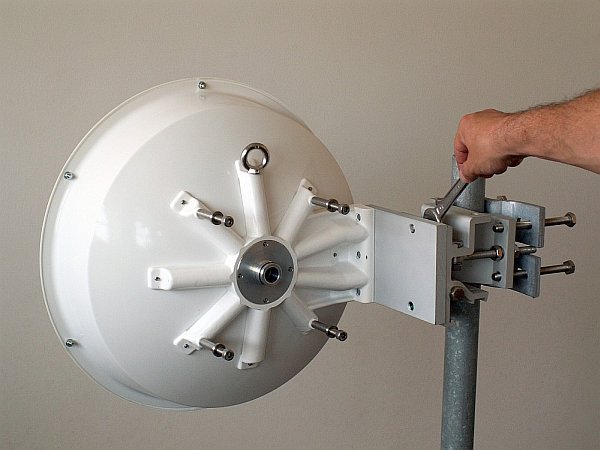
Ray Microwave Link 5 Installation Racom
Http Www Wiedmannbros Com Assets Images Jd 1025r Install Manual Reduced Pdf

Vimhbr12 With Images Car Tools Tools Wrench

How To Tighten A Windshield Wiper Retaining Nut With Pictures
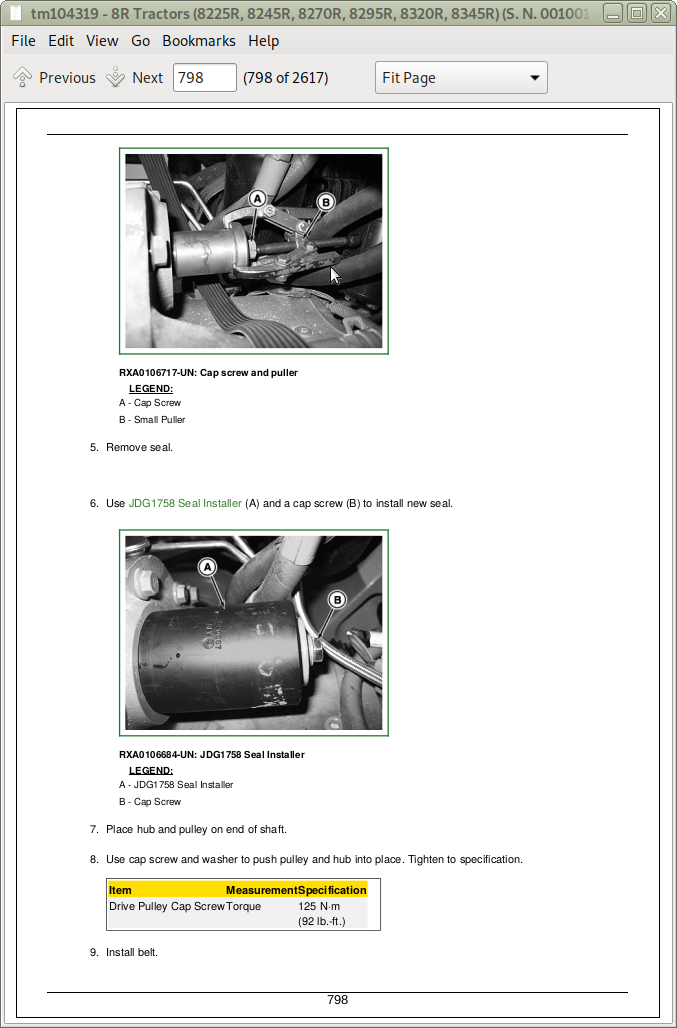
John Deeree Tractors 8225r 8245r 8270r 8295r 8320r 8345r Repair Service Manual Tm104319 A Repair Manual Store

St09 0 Steel Roof With 8 Inch Concrete Wall Axiomcpl Central Professional Library Concrete Wall Roof Concrete

How To Adjust Headset Play Bike Components

Pin By Hanso 2000 On Direct Sliding Doors Structural Insulated Panels Rose Brand Latches
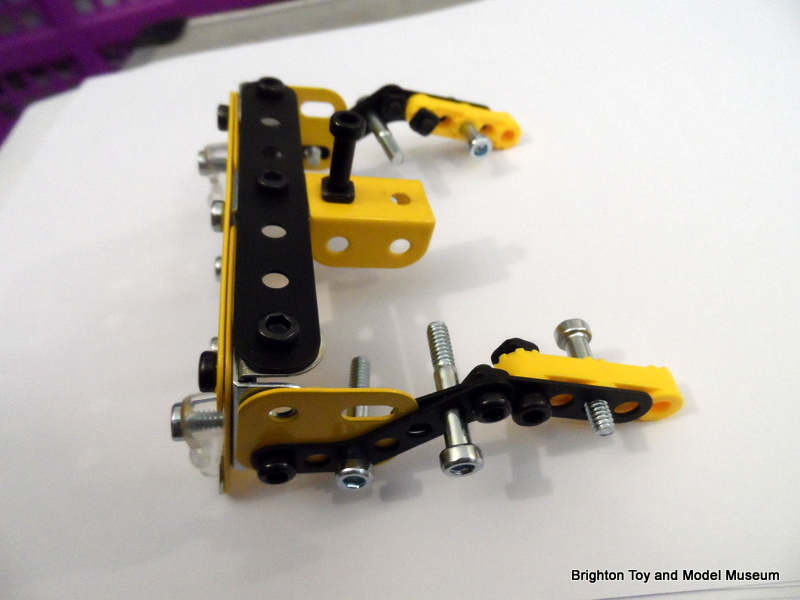
Meccano Evolution 8200 Crane Truck Assembly Notes The Brighton Toy And Model Index
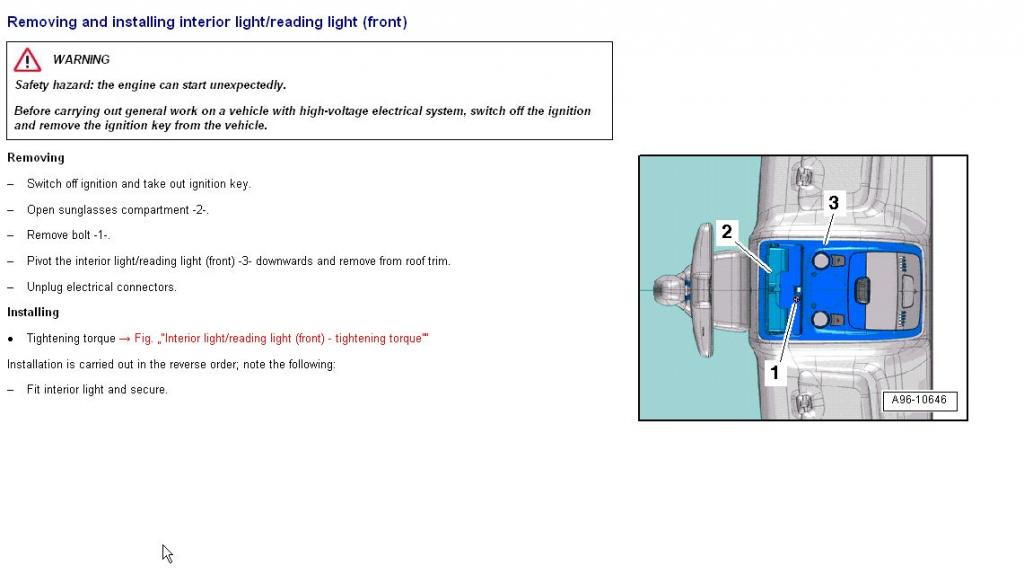
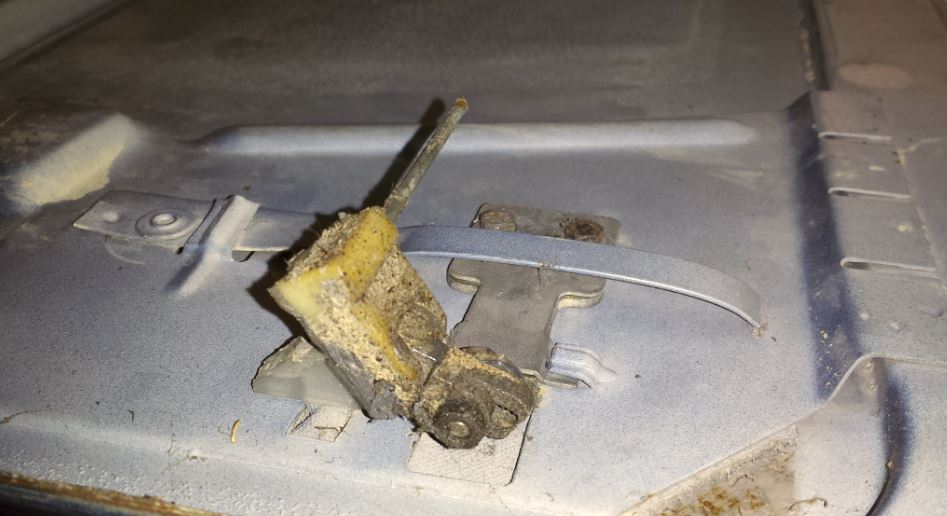
Interior Light Housing Removal Audiworld Forums

Install Write Up For Donahoe Icon Uca S Toyota Fj Cruiser Forum

How To Servicing Yeti S Switch Infinity Suspension System Worldwide Cyclery
Http Imageapi Partsdb Com Au Api Image Urlid Jib7uylefp40jcdvziyzgqlckkojjv 2buusk 2brr0okbf3cia 2bfu3322ffgoxyxf 2fw

A Simple Guide To Install Directv In Your Home
Https Www Hobson Com Au Files Product Guide Hobson Product Guide Pdf

80 20 15 Series 4392 3 Hole Pivot Plate By 80 20 Inc 10 85 15 Series 4392 3 Hole Pivot Plate 80 20 Inc Joining P Aluminum Awnings Aluminum Welding Aluminum

Triumph Sprint St Information

Jeep Cherokee Xj Transfer Case Linkage Kit Azzy S Design Works Transfer Case Custom Jeep Jeep

Roof Details Pivot Doors Detail Wood Frame Construction Pier And Beam Foundation
Westfalia Pop Up Roof Refurbishment Camp Westfalia

How To Adjust A Door Closer Door Closing Speed Force

Workshop Caring For Mountain Bike Suspension Pivots Bikeradar
Https Www Nordicgardenbuildings Com Wp Wp Content Uploads 2015 03 Conservatory Fitting Guide Pdf
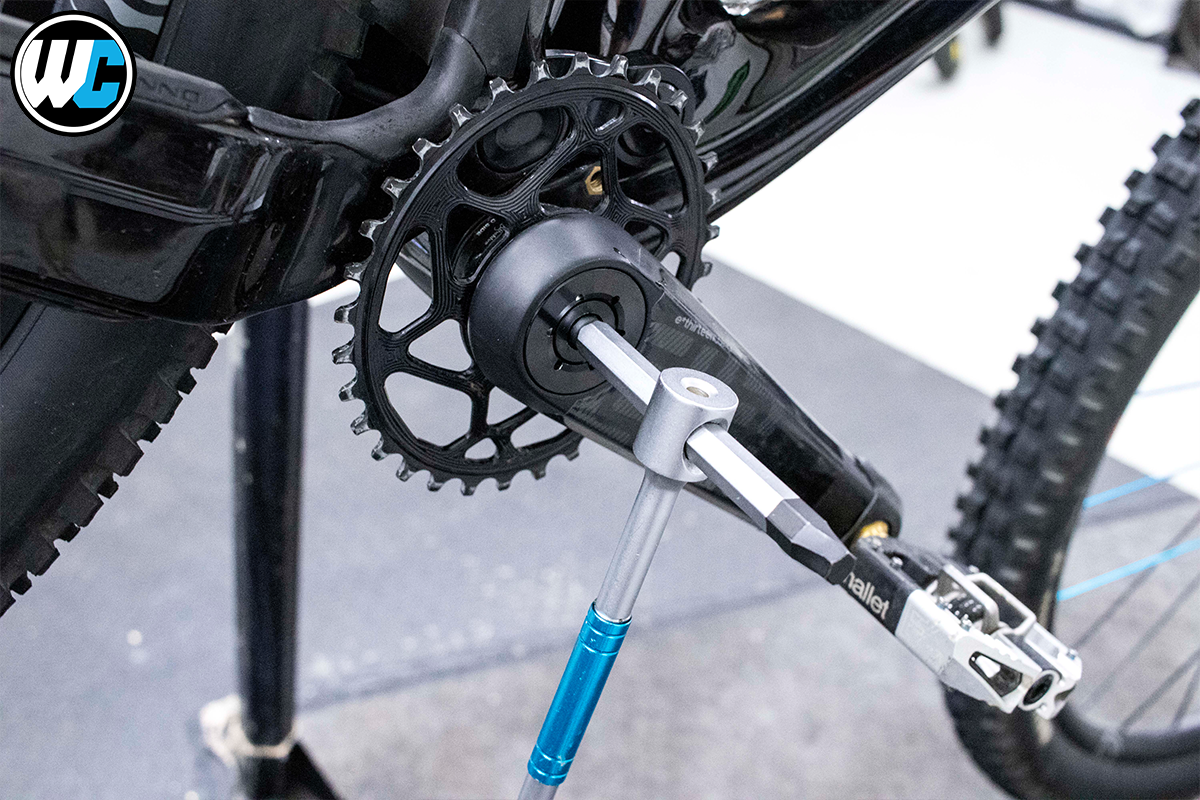
How To Remove Grease And Install Bottom Brackets Threaded And Pres Worldwide Cyclery

How To Adjust Frameless Shower Doors Doityourself Com
Hidden Creek Observatory

Forums Mtbr Com

Vario Roof R171 Troubleshooting Tree Pdf Free Download

Repair A Pop Up Sink Stopper
Https Www Bpa Gov Ee Sectors Residential Documents Proper Sealing Methods Pdf

Dual Satellite Installation Manual Pdf Free Download
Http Anarc Org Wtfda Dishmod1 Pdf

Adjust A Lazy Susan Cabinet In 5 Steps Doityourself Com